
VictorOps is a hub for centralising the flow of information throughout the incident lifecycle. Using VictorOps, your teams can resolve incidents faster to help minimise the impact of downtime and speed innovation.
In StatusHub:
To connect VictorOps to your StatusHub page open up your StatusHub account and click the option "Edit status site".

This will bring you to the edit status site page, shown below. Once here you will need to select the "Services & Integrations" option on the side menu.
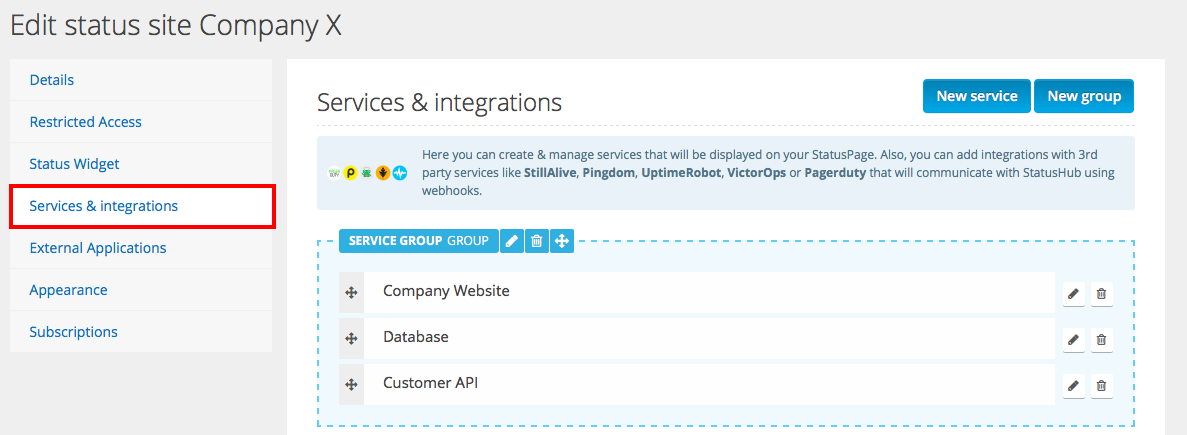
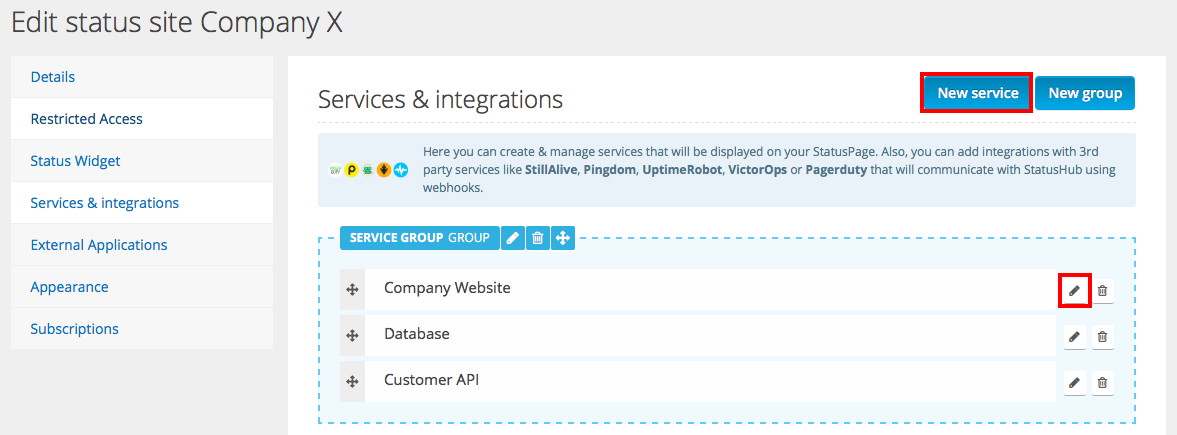
To link an existing service, you can click on the pencil icon or use the "New service" button to add a new service that will be linked to VictorOps.
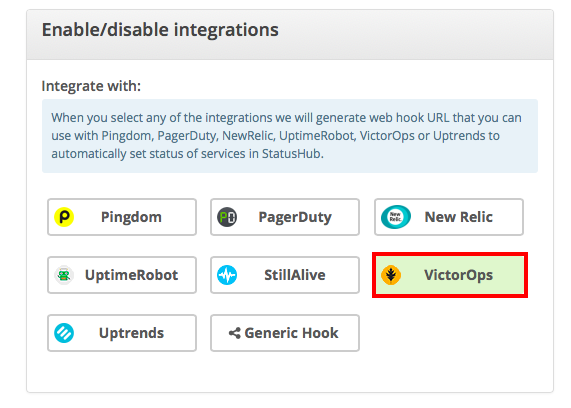
If you have opted to create a new service be sure to give it an appropriate name that you and your customers will recognise and assign it to the relevant group. Otherwise, you should select the VictorOps option hit Update Service and we will generate a webhook for you to use over at VictorOps.

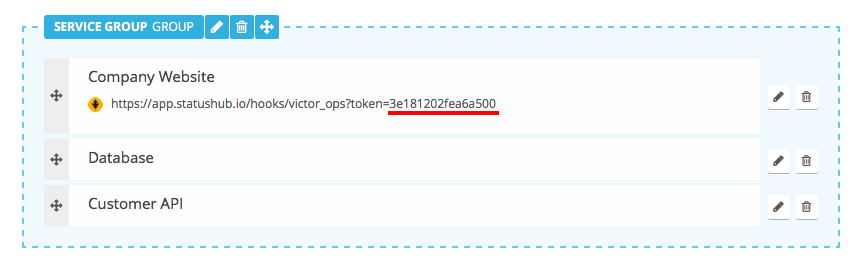
Once you have done this a webhook URL, will be displayed underneath the service you have created or updated. Copy the key (string after the equals sign, underlined below) to your clipboard for later use.
Please note that your link may be slightly different and you should always refer to "Services & Integrations" section when adding new integration in one of supported 3'rd party services
In VictorOps:
In VictorOps, select Settings >> Alert Behavior >> Transmogrifier. You will create one "Transmogrifier" rule for each service you wish to be able to update on StatusHub.

After clicking the green “+ Add a Rule”, you will set your matching criteria for the alerts that you would like to update StatusHub.
For example, if you would like all "Website" activity reflected on your StatusHub, you would set the criteria to be when ‘monitoring_tool’ matches ‘website’.
You will then set a new alert field using 'StatusHubfield' as the parameter and using the key from the Webhook URL generated by StatusHub for the value.
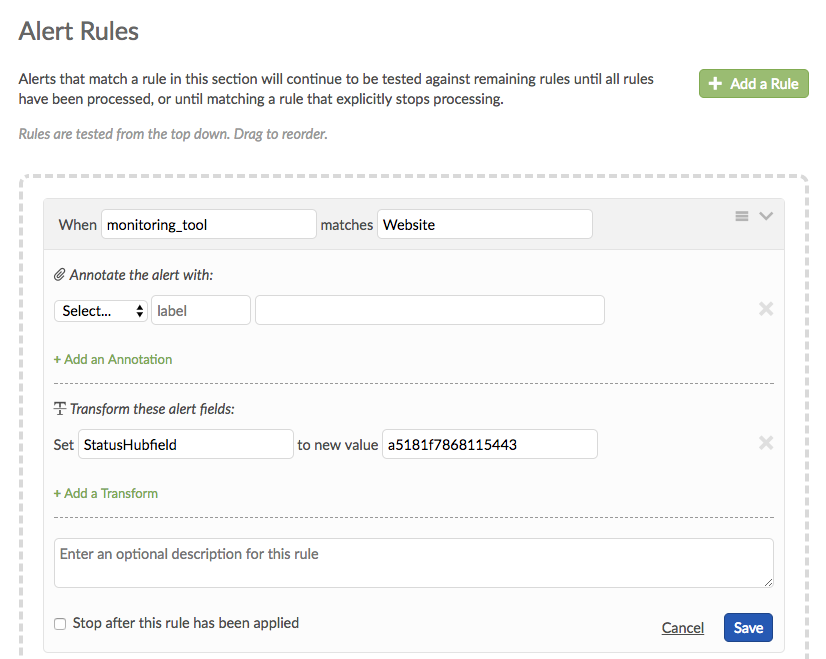
After hitting save. You should create another Transmogrifier for every service you wish to update on your StatusHub. Once you have done this, you will need to create an Outgoing Webhook.
To access this page, select Settings >> Alert Behavior >> Integrations >> Outgoing Webhooks.
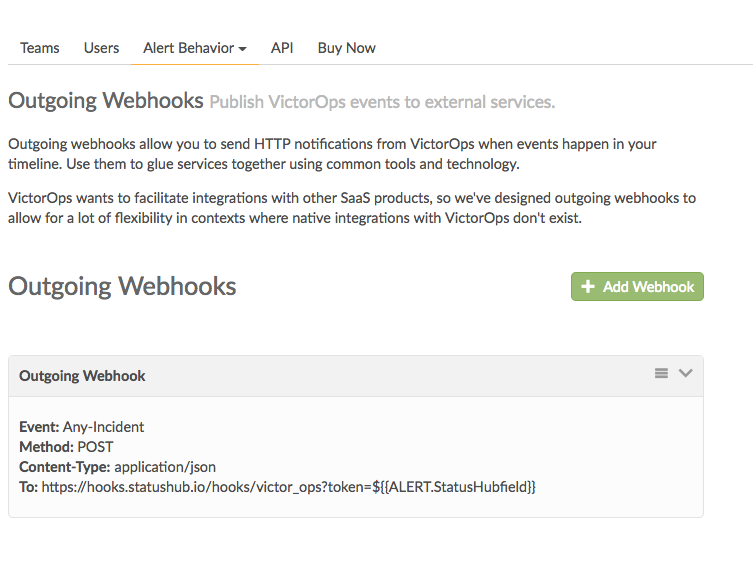
Click the green “+ Add Webhook” to create your webhook.
Be sure you have selected the “Any-Incident” option from the event drop-down.
Select “POST” for the Method
Paste the following into the To: field https://hooks.statushub.io/hooks/victor_ops?token=${{ALERT.StatusHubfield}}. This will dynamically pull in the Webhook ‘key’ for your specific service, thus completing the webhook URL so that StatusHub can be updated.
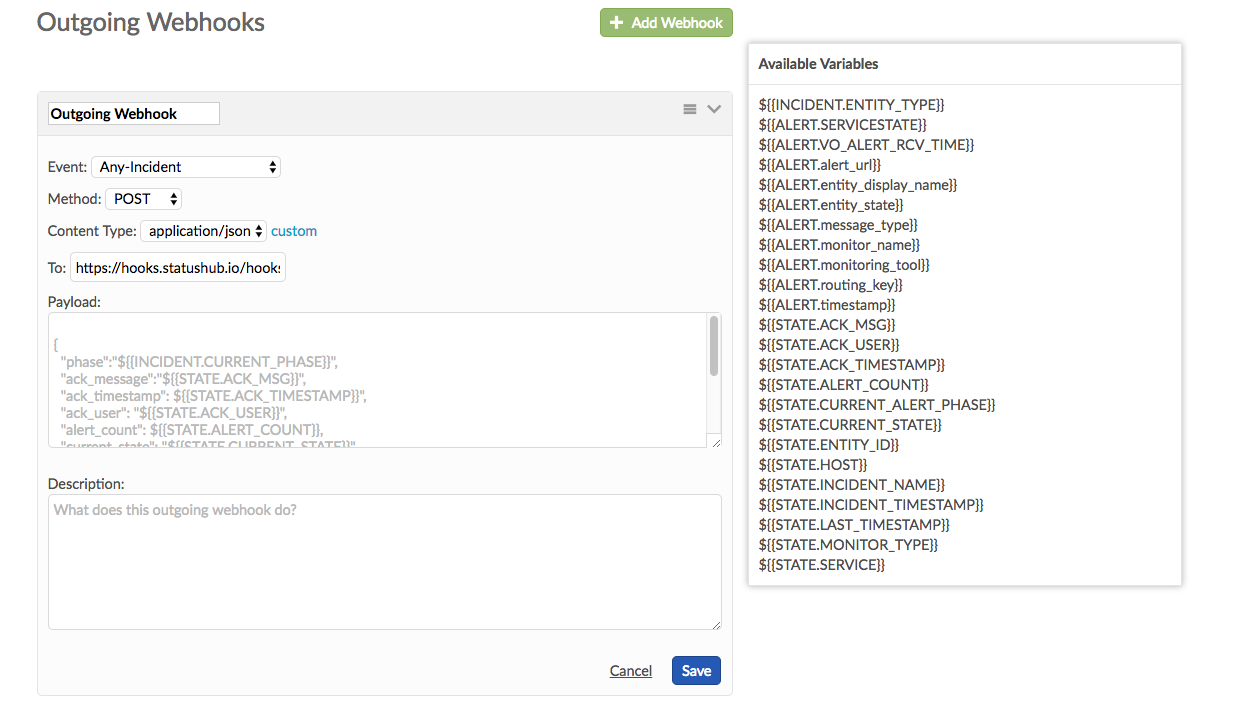
Additionally, leave the payload blank. We will automatically pull the Incident’s entity_display_name to be the Title of the Incident on StatusHub, and the state_message to be the incident’s message details.
Hit save, and you are all set.
To test the webhook, create an incident with the appropriate criteria to trigger one of the Transmogrifier rules you created. If everything works, your StatusHub page will update.
Comments
0 comments
Article is closed for comments.