
An update to an incident may be necessary under several circumstances including changing the status of the incident itself, adding another service, or changing the statuses of one or multiple services affected by the incident. Incidents may be updated from one of two places: Dashboard and History.
Updating Incidents From the Dashboard
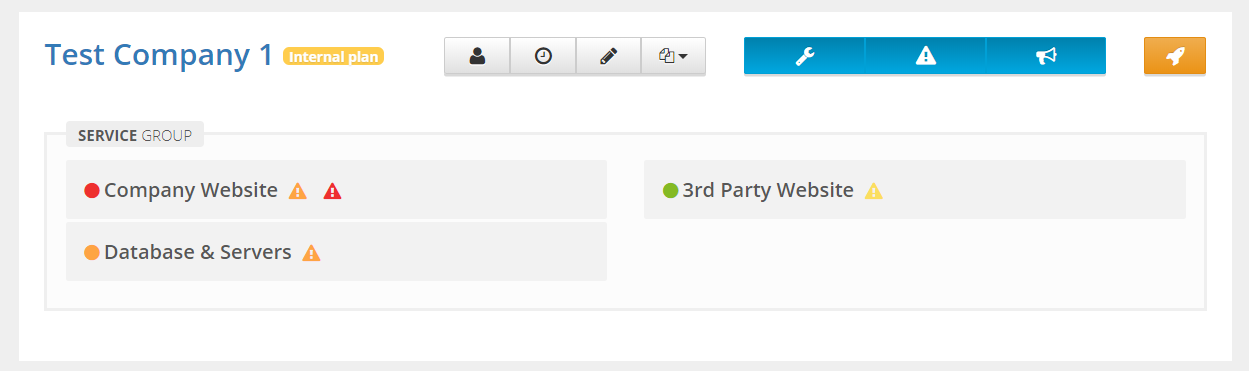
When an incident has been added for a status website, each affected service will have an Exclamation Point icon. An icon will be present on the dashboard for each currently active incident.
The icon can be one of three colors when displayed on the dashboard and these colors correspond to the incident’s current status:
- Investigating - Red
- Identified - Orange
- Monitoring - Yellow
It will appear to the left of each service that has been affected by the incident. Click on the icon to open the Update Incident Form and make changes to the incident.
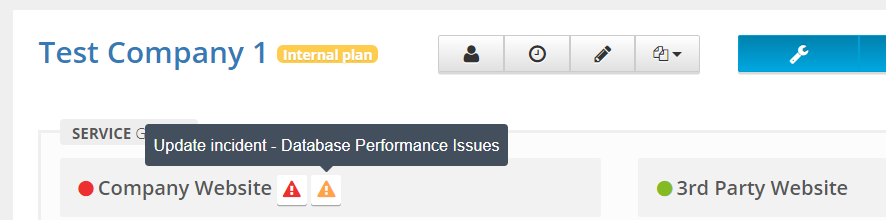
If more than one incident appears on the dashboard, hover your mouse over this icon to view the Incident Title.
Updating Incidents From History
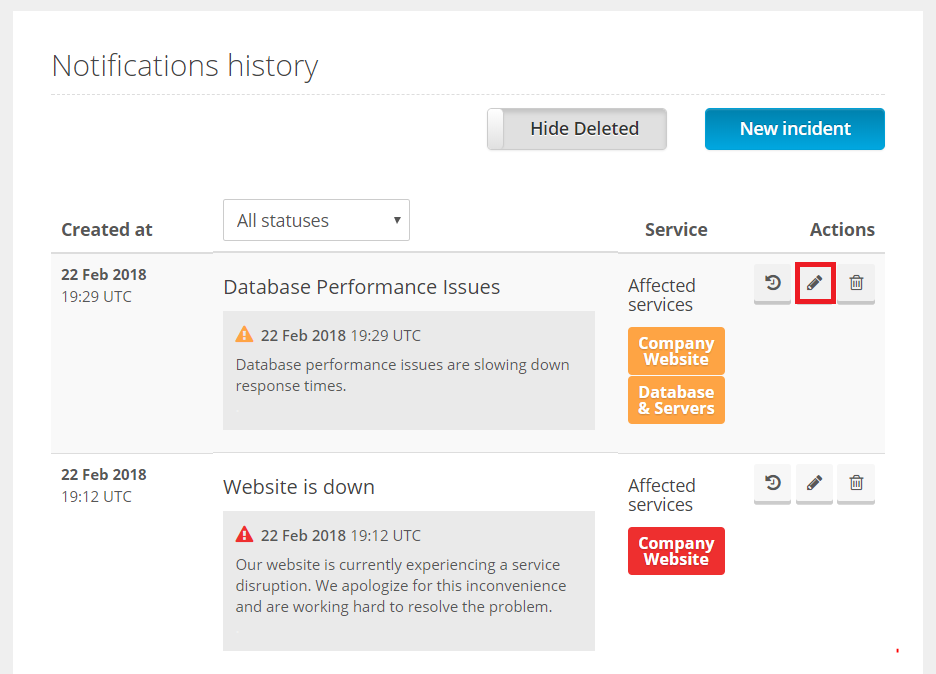
Active incidents may also be viewed and managed from history. The Incident History may be used to view additional information about each event. This can be helpful when multiple incidents exist and affect more than one service or groups of services.
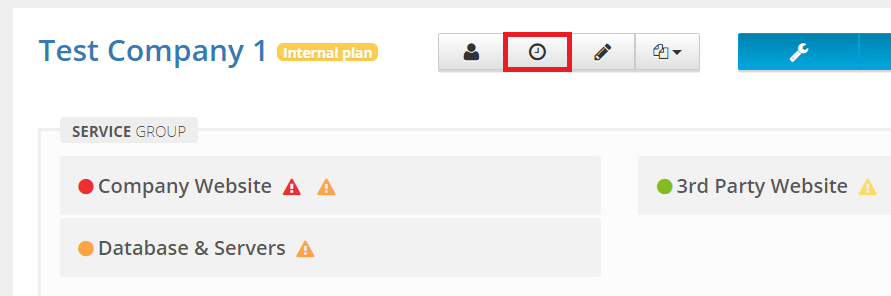
Click on the History (Clock) option within the Dashboard for the appropriate status website to view this information.
Next, make certain Incidents History has been chosen in the left navigation menu. Here you will be able to view the details of each active incident for the chosen status website.

Click on the Edit (Pencil) option underneath Actions to reach the update form. In the example below, two incidents are currently active and the first will be updated.
Note: The update form is the same regardless of how it is accessed within StatusHub.
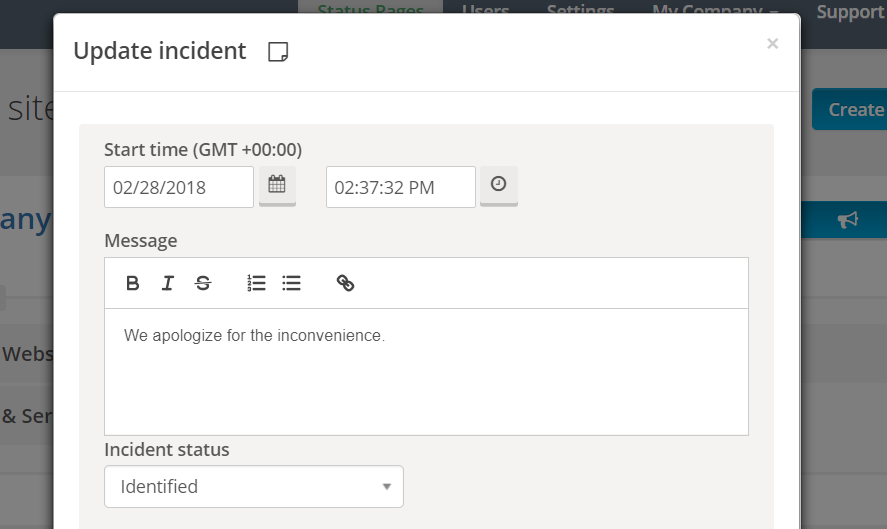
Completing the Update
The Update Incident form may be used to make changes to a selected incident including:
- Changing the Start Date and/or Time
- Entering a New Message
- Selecting Incident Status
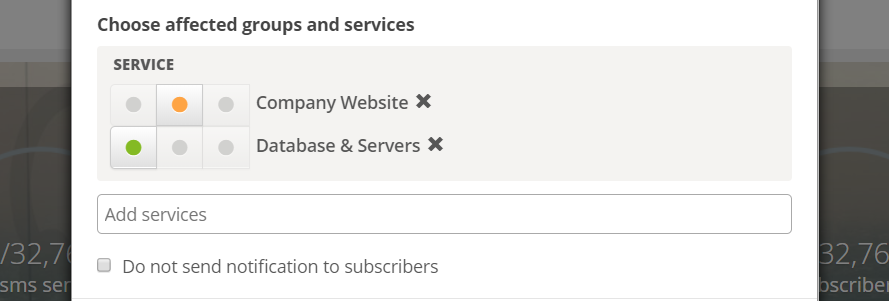
- Adding More Groups or Services
- Changing Service Statuses
Please note that an Incident Status must be selected to update the selected incident. If one is not selected, an error will be shown after attempting to complete the update.
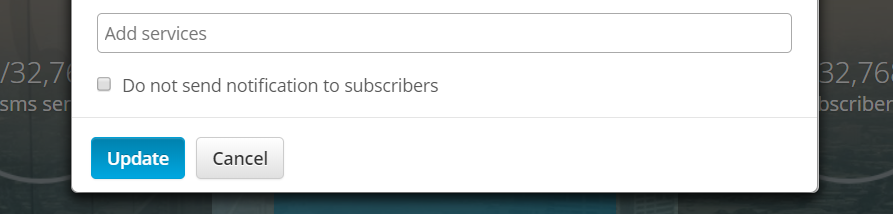
Check the option titled “Do not send notification to subscribers” if a notification should NOT be sent for the incident update. This option is unchecked by default and a notification will be sent to subscribers unless it is enabled (checked).
Once finished, click on Update to save the changes or Cancel to exit this form without saving your changes.
In the above example, the Incident Status was changed to “Identified”, Company Website service status was changed to "performance issues" and the Database & Servers service status was changed to “operating normally”. Upon saving you will be redirected to the previous screen (Dashboard or History) where changes may be viewed.
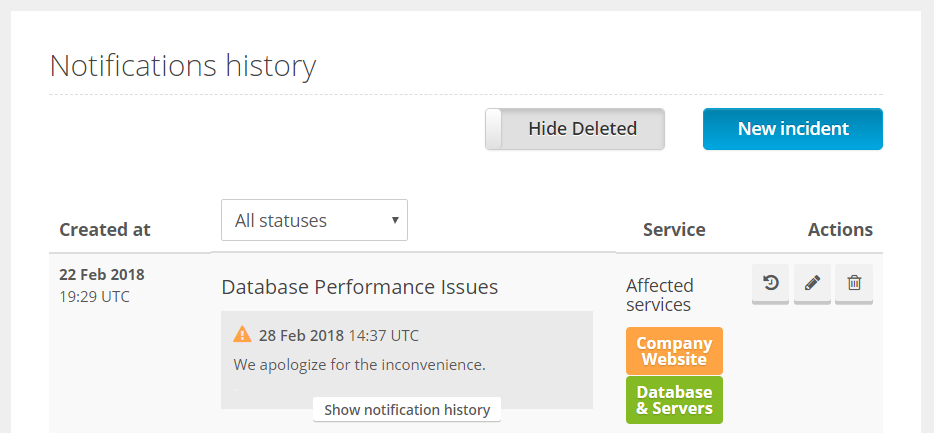
The following changes are viewable for incidents within the Dashboard. The Circle to the left of the service name shows the current status of that service for the event. The Exclamation Point Icon will be present when a service is affected by an incident and its color represents the status of that incident.

The history screen will appear slightly different, as shown below. Once an incident has been updated, it is possible to view the history of those changes as well as see updated information directly on this screen in StatusHub.
As always please feel free to contact support with any further questions regarding updating incidents within StatusHub.
Comments
0 comments
Article is closed for comments.